Introduction to Pygame
Now you should be comfortable with the Python and using the command-line. It is time to start get hands dirty with the Pygame.
Creating workspace
Before you begin you should create a workspace. A workspace means a place where you put all the files belonging to your project - in this case files for the Pygame tutorial. In the Python tutorial chapter you used your desktop as a workspace but in the long run you don’t want to put all your files on your desktop.
First you should create an umbrella directory
under your home directory called pygame-projects. Under that directory you
will be creating other directories (workspaces) to contain your Pygame
projects, including this tutorial.
Eventually you want to have your directory structure to look like the following:
C:\Users\User\
└───pygame-projects
    ├───game1
    └───game2
Creating workspace: Windows
Open up Windows Command Prompt and type:
> cd %HomePath%
> mkdir pygame-projects
No you have created an umbrella directory. You only need to do this once for your computer.
As next you need to create the workspace for the project. You can call it
pygame-tutorial. Before you do that, ensure that you changed your current
directory to pygame-projects and then create the workspace directory:
> cd pygame-projects
> mkdir pygame-tutorial
Now your directories and the workspace are ready for Pygame installation. So please keep your command-line open for further steps.
Pygame installation
Time to install Pygame. In command-line you need to step into directory
pygame-tutorial. If you have command-line open from previous step it is as
simple as:
> cd pygame-tutorial
If you accidentally closed your command-line or you’re returning to tutorial you can type in the full path:
> cd %HomePath%\pygame-projects\pygame-tutorial
Now you remember that in First steps section one of the tools for
Python you installed was pipenv? It is time to put it in the use.
Make sure that you are in the pygame-tutorial directory, type in the
following command:
> pipenv install --pre pygame==2.0.0.dev20
The pipenv command does several things at once. At the first time it may
take a long time to run since it builds up some caches. So what happens when
you run the command? First pipenv creates a virtual environment. Then it
downloads and installs specific version of Pygame for you (2.0.0dev20 in this
case). As last it checks all the dependencies for Pygame and installs them
if necessary.
You should see the output similar to following:
Creating a virtualenv for this project…
Pipfile: C:\Users\user\pygame-projects\pygame-tutorial\Pipfile
Using c:\users\user\appdata\local\programs\python\python39\python.exe (3.9.0) to create virtualenv…
[====] Creating virtual environment...Already using interpreter c:\users\user\appdata\local\programs\python\python39\python.exe
Using base prefix 'c:\\users\\user\\appdata\\local\\programs\\python\\python39'
New python executable in C:\Users\user\.virtualenvs\pygame-tutorial-5se6izmW\Scripts\python.exe
Installing setuptools, pip, wheel...
done.

Successfully created virtual environment!
Virtualenv location: C:\Users\user\.virtualenvs\pygame-tutorial-5se6izmW
Creating a Pipfile for this project…
Installing pygame==2.0.0dev20…
Adding pygame to Pipfile's [packages]…
Installation Succeeded
Pipfile.lock not found, creating…
Locking [dev-packages] dependencies…
Locking [packages] dependencies…
Success!
Updated Pipfile.lock (14f5b3)!
Installing dependencies from Pipfile.lock (14f5b3)…
================================ 1/1 - 00:00:00
To activate this project's virtualenv, run pipenv shell.
Alternatively, run a command inside the virtualenv with pipenv run.
Verification
To verify that Pygame was installed successfully type the following:
> pipenv run py -c "import pygame"
pygame 2.0.0.dev20 (SDL 2.0.12, python 3.9.0)
Hello from the pygame community. https://www.pygame.org/contribute.html
That indicates successful installation and you’ve verified the Pygame installation.
Note
In case of other than Windows you shoud use python3 instead of py.
> pipenv run python3 -c "import pygame"
pygame 2.0.0.dev20 (SDL 2.0.12, python 3.9.0)
Hello from the pygame community. https://www.pygame.org/contribute.html
Note
In case of installation problems, for example if these instructions are outdated, please see https://www.pygame.org/wiki/GettingStarted.
Warning
Pipenv first looks up Pipfile up in the directory tree. If it exists it uses that file instead of creating a new one. If you experience missing Pipfile please check your directory tree that there are no Pipfile there.
Initialization and a gameloop
Now open up the code editor and create a new file. Save the file as empty to
the workspace directory using name pygame_tutorial.py. Make sure that
the filename ends with the .py extension.
You can verify that the file exists by typing the following:
> dir /b
You should see output like the following:
Pipfile
Pipfile.lock
pygame_tutorial.py
For the Pygame to actually do anything useful you need write a few lines of code.
import pygame as pg
import command tells Python that “find me a thing with a given name and
load it for use” (in reality it’s much more complex process).
as pg tells again to Python that instead of name pygame you will refer
it to as pg. This saves some typing since instead of all the time writing
pygame you can just need to type pg.
Note
Examples and source codes in the internet does Pygame import in the two
different ways. More common is just import pygame but that requires
writing pygame all the time.
You just want to save typing same few characters over and over again.
After importing Pygame youu need to initialize it. In the simplest form you can use:
pg.init()
That will initialize Pygame as completely as possible (video, audio, input, etc.).
As next you need to setup display. Setting up display is done by using Pygame
submodule display and it’s function set_mode():
pg.display.set_mode([500, 500])
The first parameter for the set_mode() is a width and a height as a list.
Width and height units are pixels.
Now your complete file should look like the following:
import pygame as pg
pg.init()
pg.display.set_mode([500, 500])
Save the file and run it:
> pipenv run py pygame_tutorial.py
pygame 2.0.0.dev20 (SDL 2.0.12, python 3.9.0)
Hello from the pygame community. https://www.pygame.org/contribute.html
You might see the Pygame window popping up and then disappearing. Why is that happening?
That happens because your code is missing the gameloop. A gameloop is a loop that runs as long as necessary to keep your game running. A minimalistic gameloop looks like the following:
while True:
    event = pg.event.poll()
    if event.type == pg.QUIT:
        exit()
while loop works almost like the for loop from the tutorial. while
loop executes following intended lines as long as condition after while is
true. In the above code it means that while loop is run “forever”.
pg.event.poll() polls single event from Pygame event queue. Events and event
queue is explained later. The program stores polled event in the event variable.
Finally program checks if event type was pg.QUIT meaning that the Pygame
requests your game to stop running. You already used exit() command
to exit from Python console and the same function can be used to exit the program.
Now your file should look like the following:
import pygame as pg
pg.init()
pg.display.set_mode([500, 500])
while True:
    event = pg.event.poll()
    if event.type == pg.QUIT:
        exit()
When you save the file and run it:
> pipenv run python pygame_tutorial.py
pygame 2.0.0.dev20 (SDL 2.0.12, python 3.9.0)
Hello from the pygame community. https://www.pygame.org/contribute.html
You should see Pygame window appearing and staying visible. When you click ‘X’ to close window application closes. Congratulations! You have done your first Pygame application.
Note
Code runs in a busy loop and high CPU usage is expected result.
Events
In your first pygame application you polled events from event queue. Pygame has
an event queue which holds all kinds of events happening on the background.
There are events like pg.QUIT but also events that handles keyboard, mouse,
joystick or game controller, video and few others. And there is also a way to
define user events.
When an event happens it is actually placed in a list of events. The list, or actually queue, works so that when even it read, oldest one is returned to the event reader. New events are place at the other end of the list.
Note
Event list (the queue) has maximum length. After list is full, no new events can be added to it.
You need to make sure that you poll events fast enough not to cause event queue to fill up.
Events do have properties. A property is readable and sometimes writable
attribute of some object. Event object has always at least one property called
type. In minimalistic gameloop only event type used was pg.QUIT.
Common way to handle all events from the queue is to use for loop to
get events:
for event in pg.event.get():
    if event.type == pg.QUIT:
        exit()
As you see code is only slightly different than previous one. for loop uses
pg.event.get() which returns a list of all events that has occurred since
last time for loop was executed.
How about handling a keyboard? Let’s say that you want to set space key to
do jump for player. Code for that would look like the following:
if event.type == pg.KEYDOWN and event.key == pg.K_SPACE:
    print("Jump!")
if in above code uses two properties. First property is the common
type and because now code tested key down event pg.KEYDOWN there exists
also second property the key. The key contains integer value of key
which was pressed down. Unfortunately you don’t have to remember values
because Pygame provides easily memorable constants.
Note
Full list of keys can be found at https://www.pygame.org/docs/ref/key.html#key-constants-label
Now the full program should look like the following:
import pygame as pg
pg.init()
pg.display.set_mode([500, 500])
while True:
    for event in pg.event.get():
        if event.type == pg.QUIT:
            exit()
        if event.type == pg.KEYDOWN and event.key == pg.K_SPACE:
            print("Jump!")
Save the file and run it. Hit space-key few times and you should see text
“jump” in the command-line.
> pipenv run python pygame_tutorial.py
pygame 2.0.0.dev20 (SDL 2.0.12, python 3.9.0)
Hello from the pygame community. https://www.pygame.org/contribute.html
Jump!
Jump!
For the fun try to add other keys as well.
Summary
You now have learned basics of the Pygame:
How to install Pygame using pipenv
How to initialize pygame with
init()Events and event queue
How to read keypress
Surfaces
Now it is finally time to see some graphics!
In Pygame graphics are dealt with surfaces. A surface is special type of image in memory. You can do various operations on surfaces like draw on them, rotate resize, recolor etc.
The screen, which is displayed to you, is also a surface. In the current version of project you haven’t assigned screen surface to any variable, so you need to change display setup as the following:
screen = pg.display.set_mode([500, 500])
The set_mode() returns the screen surface. It means that you can do
operations on the screen surface. Try drawing the rectangle:
pg.draw.rect(screen, (255, 255, 255), ((10, 20), (30, 40)))
pg.draw.rect() draws a rectangle. It takes in quite a set parameters and
as you can see there are quite many parenthesis. Parameters are:
screen- a surface to draw rectangle to, in this case you draw directly on to screen.
(255, 255, 255)- A color triplet. Each number represents one value of RGB component constiting of single color. Values are from 0 to 255. If all values are 0, it’s black, if all values are 255 color will be white.
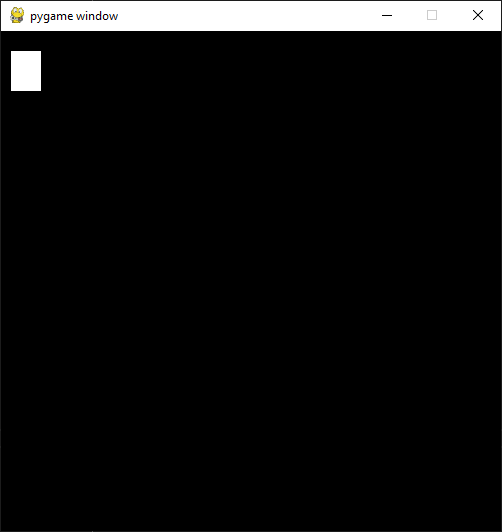
((10, 20), (30, 40))- Rectangle to draw first pair of numbers(10, 20)are the position on the screen surface.(0, 0)would upper left corner. Rectangle is drawn 10 pixels on x-axis from left border and 20 pixels down from top of the screen. Second pair of numbers(30, 40)are the width and the height of the rectangle in pixels.
If you run your application now it runs but there are no rectangle visible.
Pygame doesn’t draw directly to the screen. It first prepares the screen behind the scenes, then shows it all at once only when it’s ready. This is done with the following function call which you need to and end of the gameloop:
pg.display.flip()
At this point your full code should look like the following:
import pygame as pg
pg.init()
screen = pg.display.set_mode([500, 500])
pg.draw.rect(screen, (255, 255, 255), ((10, 20), (30, 40)))
while True:
    for event in pg.event.get():
        if event.type == pg.QUIT:
            exit()
        if event.type == pg.KEYDOWN and event.key == pg.K_SPACE:
            print("Jump!")
    pg.display.flip()
And when you save the file and run it you should see the following window:
Rects
When drawing rectangle you had to give coordinates and size of the rectangle
as last parameter for pg.draw.rect(). The last parameter is actually
a Rect object.
A rect is a definition of rectangular area. When creating a rect you need to
give four attributes as following:
- location - x and y.
- size - width and height.
You can define those like the following:
rect = pg.Rect((240, 240), (20, 20))
The code above will create you a new Rect object with given location and
dimensions. Rect has set of properties that you can read and write to
modify for example location. How about changing space key to make your
rectangle teleport to an another location?
You can a rect properties to change your rectangle location. To achieve
that you can now use x and y properties of the rect to change it to a
new location. Modify your program as the following:
import pygame as pg
import random
pg.init()
screen = pg.display.set_mode([500, 500])
rect = pg.Rect((240, 240), (20, 20))
while True:
    for event in pg.event.get():
        if event.type == pg.QUIT:
            exit()
        if event.type == pg.KEYDOWN and event.key == pg.K_SPACE:
            rect.x = random.randrange(0, 479)
            rect.y = random.randrange(0, 479)
    pg.draw.rect(screen, (255, 255, 255), rect)
    pg.display.flip()
Save the file and run it. Try to press space few times. You see new rectangles appear but old ones stay. Why is that?
That is because you don’t clear the drawing surface. When flipping the screen pygame just copies hidden drawing surface to the display surface. So it’s up to you to clear the drawing surface. The simplest way to do that is to fill the whole drawing surface with a background color, in your case with the black.
So add the following just before drawing the rect:
screen.fill((0, 0, 0))
The code above fills the whole screen surface with the black color.
Now your complete code should look like the following:
import pygame as pg
import random
pg.init()
screen = pg.display.set_mode([500, 500])
rect = pg.Rect((240, 240), (20, 20))
while True:
    for event in pg.event.get():
        if event.type == pg.QUIT:
            exit()
        if event.type == pg.KEYDOWN and event.key == pg.K_SPACE:
            rect.x = random.randrange(0, 479)
            rect.y = random.randrange(0, 479)
    screen.fill((0, 0, 0))
    pg.draw.rect(screen, (255, 255, 255), rect)
    pg.display.flip()
Save the file and run it. Hit space to make your rectangle to teleport new locations on the screen!
Rect has several properties that you can read and write, here is the
complete list:
Property |
Explanation |
|---|---|
x |
x - coordinate |
y |
y - coordinate |
top |
top - coordinate (same as y) |
left |
left - coordinate (same as x) |
bottom |
bottom - coordinate |
right |
right - coordinate |
topleft |
(x, y) - coordinate pair of top left corner |
bottomleft |
(x, y) - coordinate pair of bottom left corner |
topright |
(x, y) - coordinate pair of top right corder |
bottomright |
(x, y) - coordinate pair of bottom right corder |
midtop |
(x, y) - coordinate pair of middle of top edge |
midleft |
(x, y) - coordinate pair of middle of left edge |
midbottom |
(x, y) - coordinate pair of middle of bottom edge |
midright |
(x, y) - coordinate pair of middle of right edge |
center |
(x, y) - coordinate pair of center of rect |
centerx |
x - coordinate of center of rect |
centery |
y - coordinate of center of rect |
size |
(w, h) - width and height pair of rect |
width |
width of rect |
height |
height of rect |
w |
width of rect |
h |
height of rect |
Blitting
Blitting is a term that is used in the context of Pygame to mean copying
surfaces. Blitting always requires two components the source surface and
the destination surface. In Pygame Surface is actually an object and
it has method blit().
Since drawing rectangle is an expensive operation, doing that all the time is not efficient programming. Instead of that you will now create a surface that will be the rectangle:
square = pg.Surface((20, 20))
square.fill((255, 255, 255))
rect = square.get_rect()
pg.Surface((20, 20)) creates 20 pixels wide and 20 pixels height surface.
It’s exactly same sized as your rectangle in the previous code.
square.fill((255, 255, 255)) should be familiar already. This time fill()
fills whole square with white color. You could have used
pg.draw.rect(square, (255, 255, 255), ((0, 0), (20, 20)) as well.
Finally you get a rect from your surface - the square.
Since there is no more need to draw rectangle all the time using pg.draw.rect
you will be doing the blitting.
screen.blit(square, rect)
screen is your screen surface and because you call method blit on screen
surface it will be the destination. The first parameter for blit() is the
source surface - square in this case. The second parameter is rectangle describing
where to copy square.
So above code reads “copy square to screen at location rect”.
Your full code should look like the following:
import pygame as pg
import random
pg.init()
screen = pg.display.set_mode([500, 500])
square = pg.Surface((20, 20))
square.fill((255, 255, 255))
rect = square.get_rect()
while True:
    for event in pg.event.get():
        if event.type == pg.QUIT:
            exit()
        if event.type == pg.KEYDOWN and event.key == pg.K_SPACE:
            rect.x = random.randrange(0, 479)
            rect.y = random.randrange(0, 479)
    screen.fill((0, 0, 0))
    screen.blit(square, rect)
    pg.display.flip()
Summary
Congratulations! Now you do have basic knowledge of Pygame and it’s concepts.
surfaces - you know what they are and how to create new surfaces.
rects - how to create, manipulate use them.
blitting - how to copy images to screen.